Tuesday, September 3, 2013

Vacation Photo overload?

You just got back from a great Vacation at Yellowstone Park, or a weekend getaway at the beach or a week stay at Walt Disney World, what do you do with those 1000+ photos you took?

  1. leave on the camera memory card
  2. upload to your computer...for no one to see
  3. print them at Target and keep in an envelope
  4. share on Face Book

OR how about PRESERVE those Memories! You don't need to be an avid Scrapbooker or Computer Whiz to be able to preserve and showcase your photos. Here are some fun, simple and unique ways to do just that.

First, get the photos off the camera and onto your computer. I love using Google's Picasa. It a free program you can download to your computer to store, edit, print and more.

Second, look through them. I mean spend some time and pick out those favorite shots of your daughter in the pool, or your Mom riding horseback, etc...you know the shots. You don't NEED to scrap or print EVERY picture you took, that's just took much work.

Third, once you have your top selection of photo memories figured out, its time to do something with them. here are some ideas I have done.

mini "one picture" books

These are my favorite little timeline books, you can do this from annual vacation getaways to school pictures or birthdays, the possibilities are endless!

 
this is my Disney salute to NY book
Each time my husband and I go to Walt Disney World in FL, we take a picture in the same spot with the NY backdrop behind us.


Keepsake Albums
 
 
If you took a special trip, a once in a lifetime trip, like a friend of mine did to Walt Disney World you can create a custom Keepsake Album.


I created this book for her family with a large spiral chipboard album


Collage Photo Page
 
Maybe you have a lot of favorite photos, so using the collage maker through Picasa you can put them all together in one "big" picture. Add into to a piece of scrapbooking paper or card stock and then you can frame it and display or create a special album of all these great collages.


this I made for a sweet friend of mine after we had a fun filled weekend at WDW


4 x 6 Pictures with Journal cards
 
 
There are so many quick and easy products available now at your local craft store to big chains like Target. Buy a Photo quality 12 x12 album and the 6 slot 4 x 6 refill pages and you could put together a whole album in less than a day!


This is an example of just that. I like to use these pages mixed within my traditional albums. I slide in the photos and then use pre cut cardstock and stickers and add story behind the pictures. Very easy!


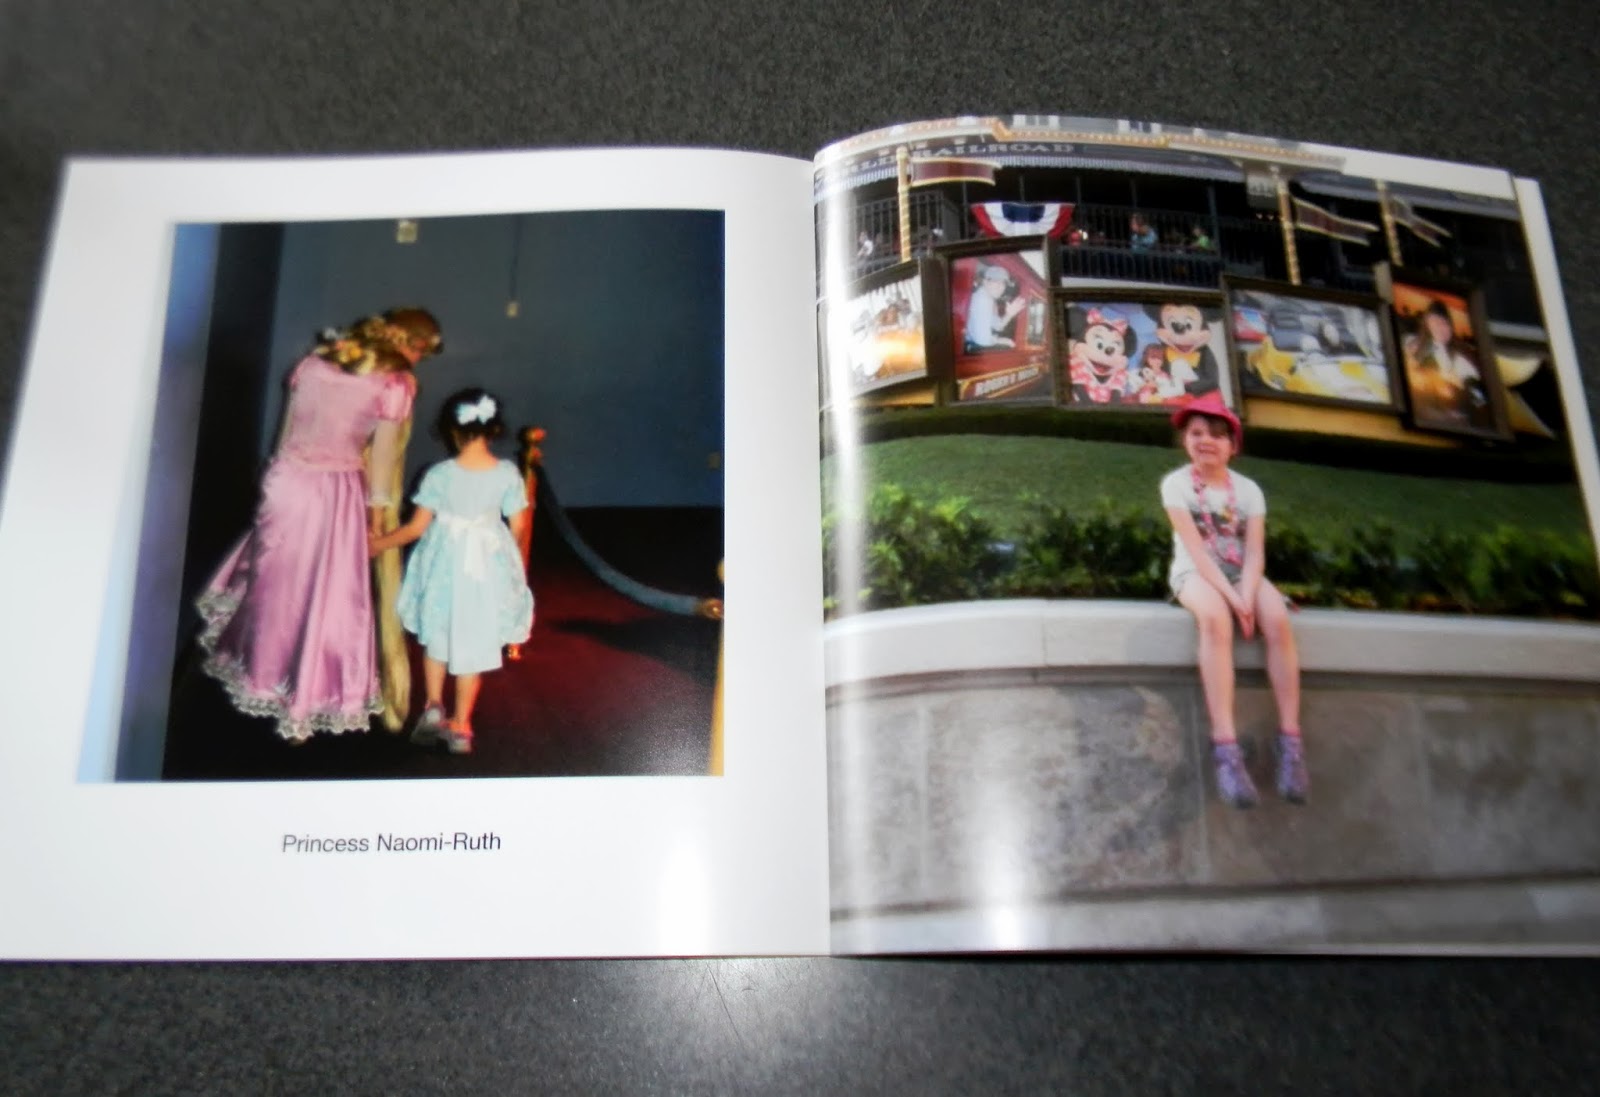
A digital photo book from a website, such as Shutterfly or Snapfish.
 
 
The picture of the album below is similar but was made using a digital photo maker through Disney's PhotoPass website. These type of albums are so quick and easy to do now. For the Traditional sites, you can just upload your selected photos, pick your theme and let "it" create the book for you. My Mother does this all the time.


iPhoto book
 
It seems just about everyone is snapping photos off their iphone or ipad nowadays, including on Vacations. Besides just sharing them on Face Book or Twitter why not use a great new app called Simple Prints. You select photos off your idevice, place on the page, and order, Cant get any easier!


You can even personalize the pages after you receive your book in the mail.  Add some stickers and other embellishments. PERFECT!
 
 
Another mixed media in digital scrapbooking can be done through Mixed Book.
 
Although I have not personally done these, I've heard it is quite easy and fun and you can purchase themed packs (including Disney) to make the pages even more unique. The pictures below were made by a fellow Disney Fan Erica B.


Traditional Scrapbooking
 
This is probably the most time consuming of all of these ideas, but alas my favorite. I truly love the feel of paper and adding my photos in unique patterns and layouts, then adding all the little pizazz.
 
 
a souvenir collage

 
simple use of space and design

 
play on the scene in the title "beach"

 
Postcards as journal spaces
 
In case you think I go nowhere but WDW...here are a few pages from other vacations to the Atlanta area and the beach.
 
 The top photo is an example of a souvenir collage. You know all that stuff you pick up along the way, now you slap it down on a piece of paper and add it to your photo album.
 
The second two just showcase simple to a little more flair of the use of simple embellishments, clever title letters and basic photo layouts is really all you need.
 
The last photo shows a great way to close an album. This layout is the closing page to a Myrtle Beach Family vacation we took back in 2003 with my parents and sister's family. I had each person write down their favorite memories on some purchased postcards and attached them in the book.
 
 
I truly hope some of these ideas have inspired you, to get those photos out of that envelope or upload to print and find a way that preserves your vacations memories!
 
Coming next in this series (why not, huh?) is Vacation Photos preserved as a display! stay tuned


happy memory making, preserving, and crafting! Thanks for reading, Julie


Thursday, August 29, 2013

"Does that have Gluten in it? Or dairy, eggs..."

Here is a special post that I wrote and shared on gluten free dairy free wdw.BlogSpot
ENJOY!


Going out to eat on vacation is certainly a highlight for most people. However for my daughter Naomi-Ruth (6) it can be a bit confusing and scary. You see since birth she has endured food allergies and tolerances to gluten, wheat, dairy, eggs, red food dye, and most recently life-threating reaction to peanuts and tree nuts. Needless to say, dining out for her requires a lot of planning and knowledge.

It does seem more and more that local restaurants have gluten or dairy free options, and many places will let you look at the ingredient listings. Just going to Mc Donald's is a small feat, but imagine being away from home on vacation for over a week?

This is one reason why my family continually travels to Walt Disney World in Florida. This place gets it and caters to children and adults like my daughter with such ease and knowledge it can be a little less stressful figuring out what she can eat while we are there.

Just recently we went to Walt Disney World in June for a week. Before we went, I checked menu lists on allears- dining menus and checked the allergy reference lists from glutenfreedairyfreewdw.blogspot reference sheets

I made lists of brands that I knew she could have and jotted down items that we could order off the straight menu or would need to get specially prepared. In an attempt to help another guest who may be curious about how to order and what are the options but not to overwhelm you with EVERYTHING...below is a small reviewin my daughters perspective, with descriptions from myself and pictures too.


" I love going to Disney World! I like Its a Small World, the Haunted Mansion, and the Ariel Ride (the new Under the Sea ride in the Fantaslyland Expansion).


[when asked what do you like to eat there?]
 
 
Mickey waffles, fruit, fries, and treats. Disney makes me my own special food [big smile]
 
We ate in Italy for lunch and the nice cooker [chef] made me my own pasta and I had the best rolls ever!


So how does one go about ordering a special allergy free meal at a Table Service Restaurant at Disney? The first thing to do is INFORM. You can either note the allergy needs online or over the phone when you make your dining reservation and/or inform your server upon being seated. Next step EXPLAIN (in detail) before you order your meal, either the head chef or manager of the restaurant will come to your table and go over what food items the person in need CAN NOT have. They will describe what offerings they do have and you can decide on a meal together. Sometimes it is a completely custom made meal or a version of an item on the existing menu.

At Via Napoli in Epcot, we were able to get pasta that was gluten, dairy and egg free, sauce on the side, diced plain chicken, and her own rolls made with tapioca.

As you can see in the picture above the portions were quite generous and my daughter was beyond delighted.

 
I also got to eat in Belle's ballroom and had steak and green beans, fries too!


I couldn't eat the grey stuff so I fed it to my Mom, she said it was delicious
 
Again at Be Our Guest restaurant in the Magic Kingdom, we INFORMED our server, and the chef came to our table and we went over her needs and ordered the perfect meal. She even received her own basket of tapioca rolls. She couldn't drink the fancy juice fizzy drink, but our server was able to give her same plain juice to drink in that fancy light-up cup her grandmother bought her.
 
 
My favorite dessert was the Mickey sundae, it had two cookies. I didn't have to share with anyone


This dessert was presented to her at O'Hana in the Polynesian resort after our dinner there. It was a huge scoop of dairy free ice cream ( they had chocolate or vanilla) and two Enjoy Life chocolate brownie cookies, plus special chocolate sauce. I was quite impressed.

 
I like smoothies, I got a blue one while we watched the fireworks


One night in the Magic Kingdom we stopped for dessert at the Counter Service stop called Sleepy Hollow. We ordered her the Liberty Swirl Slush-a combination of Fanta strawberry and blue raspberry NOTE: yes this most likely has red food color #40 in it, but it was shortly after this trip that we realized this dye was causing a skin irritation for her, I think she drank a gallon of red Kool-Aid at my Aunts)
 
I like hamburgers especially when I get a bun! it was the best bun ever. I even told the food person that


On our first day, we had lunch at Contempo Café inside the Contemporary resort. At this Counter/Quick Service location there are ordering kiosiks, where the guest handles the ordering process themselves. Typically at at Counter Service when you need a special order item, the guest needs to speak with the manager first, in which you would INFORM your order taker. At this place you can go up to the pick up window and let them know. Sometimes this process can take awhile, depending on how busy the restaurant is. Luckily for us, the manager was right there. We INFORMED and EXPLAINED to the manager we'd like to order a hamburger NO bun unless they could accomadate Naomi-Ruth's allergies. And as you can see in the picture above they could. Her order took no longer than the rest of our food.

Another quick service example I had in ordering for her was in Epcot at the Liberty Inn. Our family had started out late that day and decided to eat in the park unplanned, not a bad idea but tricky for Naomi-Ruth. I asked her what she wanted to eat and I'd try and find it. She said she really wanted a hot dog. I used my iphone and quickly brought up the menu list via allears again. I saw they had hotdogs with toppings on the adult menu, so I kept my fingers crossed and headed over there, while the rest of the family was eating in France.

Luck was on my side as the ordering lines were short and I asked to speak to a manager to order an allergy free meal. I told the cast member what I was looking for "a hot dog meal" and what the allergies were. She basically put together a custom order for me of a plain hotdog, tapioca hamburger bun (since they didn't have gluten, diary AND egg free hotdog ones...and I knew Naomi-Ruth wouldn't mind) plus some sides, which included fries in a dedicated fryer. I probably waited less than 10 minutes for my order to be up, which resulted in one happy girl.

her response:

this is a weird hotdog bun, but I like it, thank you Mommy I love you


In the end, we had no complications with ordering for her, with a little pre planning and know how, you can do this too. Naomi-Ruth's next Walt Disney World trip is coming up very soon in September and we are already making her food wish list. Oh and she did get those Mickey waffles, a special plate of her own was delivered to our table by the head chef at Chef Mickey's in the Contemporary Resort (please note Mickey didn't actually bring the waffles)


thanks for reading, Julie


Friday, August 23, 2013

Back to School!

Whether you have a pre schooler or High School student, attend Public, Private or Home school...the back to school season is upon us. My children headed back for their first days earlier this week:


I have two NEW Freshman in High School and a new 5th and 1st graders. I think (most of us) were ready to get back to school! With busy home and activity schedules, plus myself back to work in our home. I wanted to make sure we really were ready to get back into this season.

I began probably well over a month before school began and hit Target to start the back to school shopping, new pencils, glue sticks, markers, gym shoes, etc...As well I began some in home organizing and going through current supplies and items that are used for school and studying.

I began with organizing the shared computer/work space for the children.  We have one main computer, desk and a storage unit to keep items organized.


I went through the clutter and tossed broken pens, pencils, garbage, old papers, etc and made sure we began neat and tidy! I'm not in the idea it will stay this neat all year, but starting out well organized gives you a great head start!

I had fun making new labels for everything, which has always been a plan and let's face it how many times can you answer:

"Mom, where is notebook paper?" or "Mom I need another pen..."


The cube unit above contains most of the usual needs: loose leaf paper, notebooks, file holders to store papers, resource materials, etc. As well I have a cloth bin full of markers, crayons, and colored pencils, plus a bin full of quiet/busy activities for my youngest who doesn't have as much homework as the older children. This helps her stay busy and feel important too.


In our stairwell I having hanging cloth baskets that store various extra items the children may need as replacement through the year.


We can't expect FOUR children to share a single workspace so at the beginning of the year we pre select homework stations for each child, one likes her room, another in the dining room, etc. I have little cups and bins (sorry no picture) that have basic supplies like pencils, erasers, crayons, in it for them to grab and take to their study space.

Once I get a feel for what work they will be having on a regular basis I write out "Are you Homework Ready?" chart/list. An example is

  1. Have sharpened pencil and eraser
  2. all papers out
  3. books and materials
  4. look over assignment notebook and individual assignments
  5. if listening to music, do you have your homework playlist ready?
  6. Do I understand my assignment?
  7. When is it due?
  8. when complete where does it go? in a specific folder or binder?
  9. if working on computer have I saved my Work?
  10. remember to ASK for Help and stay on TASK
 
 
A few other organizational items that can trip up your kids can be, well just getting moving...I have found visual reminders work for my kids.


I have created my own sheets and used various ones I have found online. Simple pictures and check off charts really can help and keeps you (Mom or Dad) from needing to keep rattling off the " get ready list"

Packing Lunches can be a dreadful and tedious task...but with some simple guides, it can be doable. I am of the mindset to let your kids do the packing but with example. I printed a neat Step by Step chart to help them out and put it on the fridge:


I also cleared an area and labeled it specifically for the lunch boxes/bags. The kids with help as needed prep their lunches the afternoon/night before.

The last minute shoes, coats, backpacks seems to take the longest.  I seem to hear almost every morning

" where's my backpack?"
 
"where are my shoes?"
 
To help un-complicate this task, I have designated a shoe spot for each of my four children and of course added a cute label:


Not pictured are the new designated bag hooks. During the school week they have hooks easily accessible outside the main hall closet, then they can store the school bags out of site as needed in the closet on the weekends or breaks. My son likes to keep his in the closet though at all times.

The hooks are under their school pictures in the main hallway! (I'm planning on making new crafty hooks which I will share another time)


The last fun label to share is my "Spoon full of Sugar..." medicine Reminder. The oldest children each take a few different daily med's that are kept in the kitchen and I just couldn't resist the Mary Poppins reference!

Happy organizing and crafting, thanks for reading, Julie


Thursday, August 15, 2013

Crafting with Kids: Homemade Birdfeeders

As our Summer vacation is winding down, yesterday I wanted to make sure we checked another item off the Summer Wish List!

**make birdhouses**

(we actually made birdfeeders instead)
 
it wasn't that hard and as long as you have some clean empty milk cartons or any type of container or box. you are set! Here is a pictorial how to:
 
 
Supplies needed: plastic drink jug or cardboard juice carton. marker/pen, cutting tool, glue, paintbrushes, tissue paper (yarn, "roofing material", and popsicle stick or thick plastic straw for bird perch-these items not pictured)


1) mark on carton with the pen openings on each side of your carton/jug, then cut out

 
2) cut up tissues into squares/rectangles and water down glue with some water


3) let kids have at it! Using glue and paintbrush to adhere the tissue onto carton/jug
 

4) After tissue paper has dried, punch a hole in top of carton and add a piece of twine (or yarn)


5) cut slits into the spout of carton


6) trim out with a cutting tool so the edge is flat


7) cut a small hole on each side to insert plastic straw or popsicle stick (I added hut glue to secure in place)

 
I added "roofing" by gluing on two paint chips

 
Fill with seeds


Hang to ENJOY!
 
thanks for reading and happy crafting, Julie
 
Pinterest inspiration: rhythmofthehome.com
 

Wednesday, July 31, 2013

Wordless Wednesday: Fingerpainting names

Happy Last Day of July of 2013....

Here's a sweet craft you can help your kids do, ENJOY!

Supply list:
paints
masking tape
poster board or heavy cardstock


Tape out the letters in your child's name or what ever word you wish to have


Then paint


Let dry for a few hours and then carefully peel off the tape


Hang up your masterpieces


thanks for reading and happy crafting, Julie
 
Pinispiration came from: attackofthetwins.blogspot.com